See bottom for an update on Evergreen Mining as of 2025-03-23, and another as of 2025-05-11. The project is shutting down on 2025-05-23. Stable farming rigs will continue to work, but the app will not, and no updates will be made to the software on your rig.
tl;dr: Evergreen is having issues. If you have issues with your farmer or app and want to head in another direction, you can set up your own farmer using Spacefarmers community node or your own full node, or you can reuse your drives for other things.
Also, you can use the official Chia software in wallet-only mode, along with the keys/mnemonic from the app, to transact your farmed Chia (it’s not “in the app” or held in any way by Evergreen).
Also, this post is a work in progress, as I want to get the info out there before everyone sets their EVG rigs on fire.
Finally, if this helps and you want to throw me a donation, https://ko-fi.com/robnovak is there. Completely optional, but it helps my coffee stash and my motivation.
As you’ve seen over the last couple of years, I’ve written about the Evergreen “miner” for Chia. It was designed as a turnkey farmer where you buy pre-plotted drives and run them with a low power single-board computer “hub.”

Evergreen was a good low-effort way to get into Chia farming, and while the price was at a premium over what you could build on your own (see my original Evergreen post for a dated example), for people who couldn’t or just didn’t want to invest the time (and some expense) into building and maintaining/managing their own farm, it was a valid option. I personally have a single-drive 12TB rig under my television and it’s spent most of its life doing what it’s supposed to. (I did get a $100 coupon for it as a promotion when I bought the gear almost two years ago, but I have never been compensated for writing about Evergreen, and they have no say in what I write.)
In the last six months, though, support responsiveness has been low, visibility of the leadership team has been mostly non-existent, and a lot of farmers have been stuck in extremely high latency support ticket loops. As I finish up this post on Saturday afternoon (March 8, 2025), it’s been over a week since either of the visible members of the Evergreen team have posted anything on Discord.
I don’t fault the support team (Jakub) for this, having been the one support person for many organizations, including crypto pools, before. But with a recent Chia day-zero type bug fix causing a flurry of panic around the closed Evergreen software platform, the Android app disappearing from the app store, along with a public conflict between the founder (and his girlfriend) and the person responsible for the software and farmer software… a lot of people are concerned about the future of the project, and people who are stuck with hardware or software issues wonder if they have expensive paperweights.
I hope that Dylan and Evergreen are able to recover and get support ramped up and the open issues resolved soon. But given that a lot of people are considering just shutting down their gear if a problem comes up, I am providing some suggestions on how to deal with the discomfort around your Evergreen farmer.
It should be painfully obvious, but this is in no way an official, endorsed, approved, or even reviewed statement from Evergreen. It’s just a guy who’s about up to 4 years in Chia trying to help the community out. And if you take any of this advice, it’s all on you with regard to the outcome. Should be pretty clear, right?
Easy button: Just let it keep farming
If your Evergreen gear is still working, submitting partials, and getting payouts, you should feel free to just let it run as long as it works. I expect based on the support volume on their Discord that most farmers are in this category.
For any of the following options, there is absolutely no official support, and you take full and complete responsibility for any change you make to the gear you bought from Evergreen. I will not provide any support either. Proceed at your own risk.

Semi-easy button: Connect to a mini-PC and load your keys
If you have a mini-PC, a Raspberry Pi, or even a spare desktop or laptop that can run Linux, you can relatively easily set up your plotted drives on your own instance of the Chia software. This should be a computer you can leave on all the time, hence the focus on low power. And you need Linux because the hard drives use the Linux ext4 filesystem (if you have a way to access them on another OS, you probably didn’t need this post).
Some possible options for your replacement farming PC (not my listings, but they are affiliate links and I may receive a commission if you buy through these links):
- Amazon HP Prodesk 600 G2 ($90) with 8GB RAM, 256GB SSD
- Amazon Lenovo ThinkCentre M71q Mini Tiny ($70) with 8GB RAM, 128GB SSD
- Amazon Beelink-type Mini Fanless PC ($80) with 8GB RAM, 128GB eMMC storage
- eBay NUC6i5SYH ($80) with 8GB RAM, 128GB SSD
- eBay NUC7i5BNK ($75) with 8GB RAM, 120GB SSD
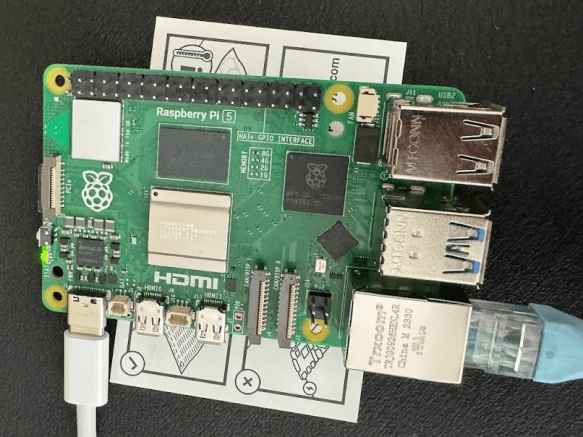
- Amazon Canakit RPi 5 Pro Starter Kit ($136) with 8GB RAM, 128GB MicroSD
- Amazon Rastech RPi 4 starter kit ($120) with 8GB RAM, 32GB MicroSD
I would suggest a minimum of a 5th gen Intel Core processor (i5/i7), 8GB RAM, 128GB SSD for use with community node or 512GB SSD for running your own node. Most of these machines can be upgraded afterward. You’ll also need a USB flash drive of at least 16GB to put the Linux installer on.
You can run a farmer with or without node on a Raspberry Pi 4 or later, although you may not be saving a lot of money and you’re giving up a lot of expansion and growth capability.
You just need to install Chia software or MadMax’s Gigahorse software (the latter is required if you’re using compressed plots, or if you plan to make compressed plots), set it up for the Spacefarmers community node, get the mnemonics off your plotted drives (see below), and configure your farmer to farm the plots on your external hard drives.
Each plotted drive should have a preload.pconf file that contains your mnemonics and addresses. Don’t modify it just in case. It isn’t used by standard Chia software. And note that these sample addresses and mnemonics are invalid. Don’t try using them, you’ll get errors.
{
"mnemonic": "chicken chicken chicken chicken chicken chicken chicken chicken chicken chicken chicken chicken chicken chicken chicken chicken chicken chicken chicken chicken chicken chicken chicken chicken
",
"first_address": "xch1xxxxcx3xx333xx3x3xccx3xx3xxxxxhx3xxcxxxxx0c3xx3xgxxxxxxx3",
"contract_address": "xch1xxxxcx3xx333xx3x3xccx3xx3xxxxxhx3xxcxxxxx0c3xx3xgxxxxxxx3",
"payout_address": "xch1xxxxcx3xx333xx3x3xccx3xx3xxxxxhx3xxcxxxxx0c3xx3xgxxxxxxx3",
"launcher_id": "q3s3n3qsp33q333o3r3333pn333o3qn3333q333333ro3r333r3qsrn3rq33333r",
"worker_name": "Evergreen_v1"
}
You use the ‘chia keys add’ command to add the mnemonic phrase shown in your files, so that your chia system can recognize your plots as yours. The “-l” parameter puts a label on the key.
This labeling is optional, but good for keeping track of multiple keys, especially if you have multiple Evergreen drives..You probably have to do this once for every Evergreen-plotted drive.
chia@chianuc5:~/chia-gigahorse-farmer$ ./chia.bin keys add -l chicken
Enter the mnemonic/observer key you want to use: chicken chicken chicken chicken chicken chicken chicken chicken chicken chicken chicken chicken chicken chicken chicken chicken chicken chicken chicken chicken chicken chicken chicken chicken
You could even install Linux (Raspberry Pi OS or Ubuntu probably) on a new 32GB MicroSD card and use the existing “hub” as your new farmer. This method also means that if your issues with Evergreen are resolved, you can just swap back in and run normally.
Note that you should start the chia wallet as well, let it get synced (via ‘chia wallet show’), and once that’s done, your farming should work. This bit me, with almost a day of “plots were eligible for farming” but no proofs. On average, a 12TB Evergreen drive with 109 plots should get 1090 points a day, or a point every 80 seconds on average, so if you don’t see proofs in the logs, check the wallet sync. Once your wallet is synced and you’re finding proofs, you can stop the wallet and reduce load on the community node.
If you have the compressed C29 plot option with remote compute, you would need a machine with a fairly modern GPU available for the compression. This is not a huge barrier, as most gaming PCs can handle this load, as well as other machines with a reasonably sized NVIDIA GPU (probably with 6GB or more of VRAM). But it is a bit more complicated, and beyond what I’ll cover here. If your new farmer has a NVIDIA GPU, it should just work.
This method also means that if your issues with Evergreen are resolved, you can just swap back in and run normally.
Scorched earth method: They’re Just Hard Drives
While there’s some proprietary magic to the Evergreen Hub mostly around software, the rest of the rig is just USB external hard drives. You can always connect them to another machine and replot over them, or reuse them for other things (backing up your NAS, etc).
Sketchy option: Sell your rig
This one isn’t something I would recommend, and I wouldn’t be comfortable selling a rig I was decommissioning for the reasons currently floating around Evergreen’s platform. But if you find someone who wants the gear and understands the issues, or who just wants the components, you could probably sell it. You can’t get your purchase price back, I’m pretty sure, but you can recover some shelf space and get a bit of cash out of it.
Where do we go from here?
I unplugged my Evergreen node, since it got quirky recently and I haven’t had the inclination to troubleshoot it myself. The drive is now connected to a NUC5i5RYB mini-pc I picked up at a flea market this morning (March 9) for about $40. I upgraded it from a 256GB SSD to 1TB because I had one around and may want to run a full node on it, but without the full node, even 128GB is more than enough.
Pro-tip: For your new farmer rig, if you choose to use one, make sure to set it to power on after power loss. I forgot that when setting up my NUC5i5, and my former-Evergreen rig was offline after some weather-related power outages at home. With Raspberry Pi or the like you shouldn’t have to do this. With most PC-type solutions, you probably do.
I hear that there will be some updates coming from the Evergreen team soon, as the support guy is back and responding again.
Update as of May 12, 2025.
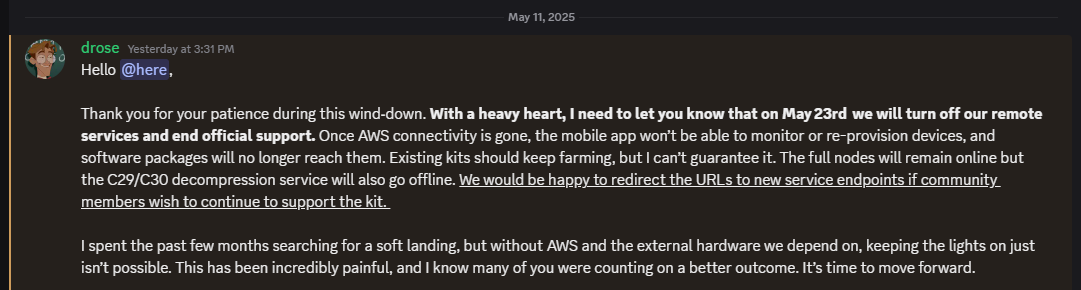
Dylan of Evergreen Miner has made an update post to the Evergreen Discord.
In short, remote services will end on May 23, 2025. There will be no more official support, although that has been the case for two months now anyway.
If your rig still works, it will continue to farm and earn XCH as before.
There is a replacement OS being developed by a group called Druid Garden (including former Evergreen folks) to keep the gear running mostly as it is today.
You can sell your drives on eBay (my guess is $10/TB in good condition), reuse them for your own purposes (Chia or not) as noted above, or Dylan has a form to connect with liquidators. This is (imffho) more relevant to larger farmers – liquidators will probably not bother with one or two drives.
Dylan doesn’t call this out, but if you have not already done so, GO INTO YOUR APP AND GET YOUR MNEMONIC/SEED PHRASE so you can access your wallet even if the app dies.
Update as of March 22, 2025.
I haven’t watched the videos about the downfall of Evergreen, but on the EVG Discord today, Dylan, the founder of Evergreen, said he has no ability to do anything with Evergreen.

I asked him to make a more clear and centralized announcement, but for now it looks like the odds of the service restoring customer support, RMAs, or fulfilling any orders that have not already shipped are pretty close to zero.
So see above, and if you’re interested in a video on the process, or even a more step-by-step blog post on the cutover and/or the GPU remote compute, let me know in the comments.
And I’ll be posting another blog soon with some farmer/plotter designs for 2025, including the machines I personally use today for both purposes. So stay tuned.
As always, if you buy through eBay, Amazon, or some other links on my post, I may earn a small commission.