
You’ve seen the first two parts of my 3D printing series, and I promised part three in the near future.
- Part 1: The Back Story, The Rationale, and The Assembly
- Part 2: First Round of Enhancements
- Part 3: OctoPrint and OctoPi (coming soon)
I decided to postpone the third part a little bit, in order to share a cautionary tale and some printer gore with you. I’m hoping this will be a one-time error, but if you’re like me, you might not think it’s so bad until it shuts down your printing operation for a week or two and potentially costs you $30+ in replacement parts.
First, the gore
-
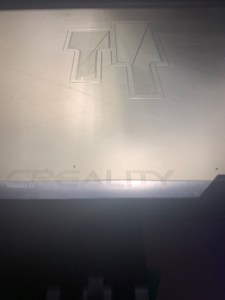
- Some etching on the PEI bed. This should have told me something was very wrong. It kinda did.
-

- Adhesion not working so well
-
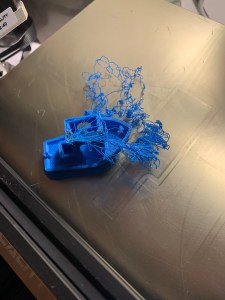
- 3DBenchy let off some steam
-

- The inside of the hotend looking down into the nozzle
-
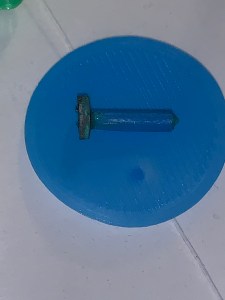
- This impromptu bolt is what you see in the inside photo
-

- Here we see the problem
Second, the TLDR
(tl;dr means too long;didn’t read. However, I hope you’ll read on.)
If you’re seeing etching or gouging on your print bed surface, or if your printer smells like burning plastic, or if your adhesion is terrible even after re-leveling your print bed, stop and figure out what’s really going on. A level (bubble or digital) and a cleanup cycle may help you get back to normal printing. And a modest stash of spare parts wouldn’t hurt.
Some parts to keep on hand:
Print nozzle and silicone “sock” for the print nozzle. You can get the nozzles and socks together for about $8, with the PTFE, extruder, and spring upgrades for about $20, or with replacement heat blocks and hotend for about $22.
Magic Eraser sponges, available at your grocery store or for a few bucks from Amazon. They are somewhat abrasive, but you aren’t going to be scrubbing with them, just wiping the melted filament off. Don’t get them wet for this use case.
PTFE tubing (as mentioned in the last post), just in case; the 1 meter kit with cutter is about $12 on Amazon, or you can get it with the $20 kit mentioned above.
Now for the narrative
I’d noticed some issues with print adhesion about 2-3 weeks ago, so I re-leveled my print bed several times. It seemed to come about when I had replaced the springs with better ones (as noted in part 2 of the series). Re-leveling the bed only worked for half or less of a print cycle, which made no sense, but I kept trying.
After “fixing” several things, many of which would have been a good idea anyway, I finally put the pieces together. I believe this is the chain of events that led to my print-astrophe.
- I attached a 3d-printed filament guide with bearing, to the left side of the X-axis gantry. This improved filament flow, but at some point the filament got stuck on the spool, causing…
- The tension from the filament feed to pull the filament guide up, loosening the bolt on the gantry, which caused…
- The X-axis gantry to become uneven. (Much later I got around to measuring it, and there was a 4-5mm difference in the left and right sides.)
- I kept re-leveling the bed, but at times the print head was too close to the bed because of the imbalance of the gantry. This caused the etching you see above in the PEI bed (which wouldn’t be terrible on its own), and
- When the nozzle pressed into the print bed, filament backed up into the hotend, leaked out on top of the heating block clogging the path during cooling. It also caused sludgy backwash into the PTFE tubing.
- The silicone sock that shields the hotend also melted a bit
- I also didn’t have the hotend heated when I replaced the first clogged nozzle, which probably helped with the clogging.
Steps to fix the problem

Cleaning the hotend


The OctoPrint post is still coming out soon. I wanted to get this episode documented before moving on, in part so that I don’t forget next time it happens.
I will also be posting an overview that hits the highlights of all of the 3d printing posts. For the impatient reader, or for someone who just wants to order all the good stuff at once (rather than over 5-10 Amazon orders over the course of a month like someone writing this post might have done), this will aggregate all the important high level topics, and you can always come back to the longer pieces for more detail.
If there’s something you’d like to see covered in this series, let me know in the comments and I’ll see what I can do.

Pingback: Money Pit: 3D Printing Part 3 – OctoPrint and OctoPi | rsts11 – Robert Novak on system administration