
This is one topic in a series of what I’m calling “money pit” projects. To be fair, it’ll be money and time pit topics, and nothing that you’d really have to get a second mortgage on your house to do… but things always get a bit out of hand.
This project is the 3D Printing project. The second part is available at First Round of Enhancements and part 3 should be out within a week.
The Back Story
It all goes back to five or so years ago, when I bought a couple of Banana Pro single board computers from LeMaker in France.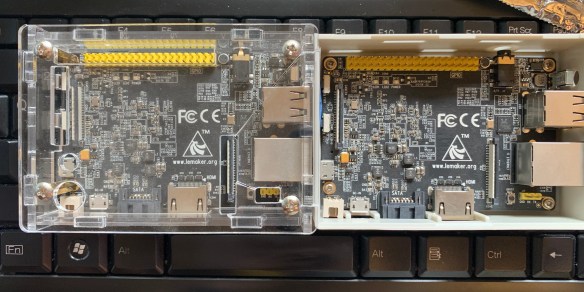 The Banana Pro was a Raspberry Pi-inspired board, but with gigabit Ethernet and external SATA on board. Great idea, but they didn’t sell as much as the RPi, so the accessory market was a lot lighter. I think there were 4 cases I found in the past 5 years, many of which were not readily available in the US.
I did order a few cases from China that had a section for the SATA drive, and stocked up on cables for the SATA drives. But I wasn’t too happy with what was out there.I found some of the 3D printer sites where people had built some cases, and thought “someday I’ll get a printer and make some cases.” I said that about every year for 4 years.
Then earlier this year, some more usable cluster kits came onto the used market from the now-defunct rabb.it startup. By “some,” I mean about a thousand of them. (Click on the photo below if you want to buy one of the kits yourself. It is an eBay partner network link but I have no association with the seller other than as a buyer of one cluster kit so far.) They each contain ten NUC5PPYB quad-core pentium NUC machines and five NVIDIA Jetson TK1 dev boards. I pondered it for several months (not as long as the printer), finally bought one, and it showed up a week later. (I’ll write more about that project separately, and you can read my friend Stephen Foskett’s Pack Rat series about the rabb.it clusters here.)
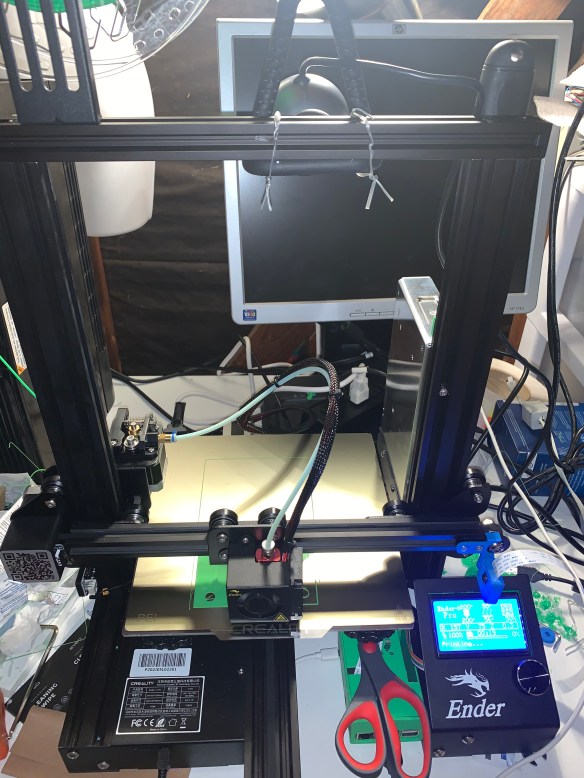 About the same time, I broke down and bought a Creality Ender 3 Pro printer from my local geek shop, Central Computers. Central also stocks the Creality-branded filament for $20 per 1kg roll, and they’re about four miles from home. You can also buy directly from Creality, or choose some sellers on Amazon like Sainsmart.
The Rationale
As far as choosing a printer, my colleague friend Steve said you can either get something cheap (~$200) and spend a lot of time and money upgrading it, or spend a lot of money (~$1000) and get it ready to go from the start.Considering that I wasn’t sure if I’d really get into the printing as much as I’d have to, to justify a $1k spend, I got a cheap, locally-in-stock, mostly pre-assembled printer and started watching blogs and videos and asking printing friends for advice. If I end up outgrowing it in the near future, I’ll know what to look for in my next one.
And as for the driving factor in finally buying *any* 3D printer, I knew the cluster kit would come on a metal door (more or less) but I wouldn’t want to take up that much space. So by being able to print some elements, I can turn that 42 inch by 17 inch platter into a more compact and graceful set of stacks. I’ll also be able to get some cases going for my Pi-type machines, and probably print some other adventures as well, but the cluster migration was the driving factor in actually dropping the coin.
The Assembly
The documentation that came with the printer is woefully suboptimal. Think IKEA documentation, but with smaller print. Luckily, the 3 Pro model is about two years old, so there are a number of videos and blogs about the assembly process.
- Just Vlad’s “Creality Ender 3 Pro – 3D printer – Unbox & Setup” on YouTube
- Lorddrake’s “Ender 3 Pro: Initial Setup and Recommended Prints” on Instructables has one paragraph on the assembly, but a lot of good stuff to follow on with.
- TeachingTech’s “Ender 3 calibration files” – pre-sliced gcode for your Ender – on MakerBot Thingiverse
Some things I had to learn the hard way
I ran into a couple of things that really got confusing. Even with the confusion, my assembly took only two hours or so.
1. Attaching the belt to the Y-axis / hotend carrier.
 The belt has two crimped metal pieces that go into slots on the underside. I was trying to figure out how to get them under the wheels on the top, until I watched one of the videos a bit more closely and tracked it down.
2. Getting the filament in place
The extruder (the piece where the filament comes in, not the hotend where it gets melted and put on the bed) has a quirky plastic clamp that makes it challenging to get the filament into the hole, down the plastic tube, and to the extruder. You get snips in the printer box, and can use them to cut an angle on the end of the filament. I’ve usually had to twist it to get it to veer into the hole properly.
You can get the filament just inside the extruder hole and then let the machine extrude a few cycles, or you can push it into the tube a bit more and just run one extruder loading cycle. With light in the right place you’ll about be able to see the colored filament through the tube (unless the filament is white). I’d push it in to close to the end of the tube and let the extruder loading cycle run once. If you push it all the way in, you’ll feed a lot of filament onto the bed and make a bit of a mess.
One of the first upgrades you’ll likely want to do is upgrade from the included plastic extruder assembly to a metal one like this one from WINSINN. I used Bryan Vines’s video to figure this out; some extruder kits will vary a bit but it’s good enough to get you going.
3. Leveling the bed
You might read about bed leveling and think “what’s the worst that can happen?” Imagine a pile of plastic spaghetti on your print bed… or if you haphazardly level the bed, you won’t have to imagine. It will take some practice, but by looking at some of the content out there about bed leveling, you can do it pretty quickly.
- All3DP has a good “simple guide,” and there are two test prints that are good to try to make sure you’re set up properly.Elproducts on Thingiverse has this Ender 3 Bed Level print elmerohueso on Thingiverse has a good Ender 3 Level Test that is good for checking the ability of curved lines to adhere properly.
You may decide to get the BLTouch auto bed leveling sensor after a few rounds of manual leveling. I’m pondering it (and a few more enhancements) that will come in a future installment of this series.
4. Consider some spare parts
In my first three or four weeks of printing, I’ve run into some issues and had to replace a couple of items. I will talk about the PTFE tubing in a later installment, but I’d suggest that you order some replacement nozzles and a Capricorn PTFE tube upgrade when you get your printer. Easier to address issues that come up if you don’t have to wait for shipping.
What’s Next In This Money Pit?
I built up a Raspberry Pi 3 to run OctoPi, which is a Raspberry Pi (3 or later) running Raspian image with the OctoPrint management software built in. This supports a camera as well as a mini-USB cable connection to the printer, and you’ll have web (and mobile app) access to your printer to manage, monitor, and watch your prints take form. You can buy kits to run OctoPrint, or if you’re like me, you have a few suitable Pi boards around gathering dust and can build your own (and of course print your own case).
I’ve also upgraded the print bed to the PEI magnetic bed. The PEI coating makes it easier to remove your printed objects from the bed. If you install this, be sure to re-do your leveling test. I’ve printed a couple of enhancements (it’s pretty meta that you use the printer to make things to improve and enhance the printer itself) that will be covered in part 2.
There are a lot of suggestions (24 of them!) in Scott Yu-Jan’s “First 24 Upgrades on my Ender 3 Pro” video on YouTube.
Stay tuned for more on my 3D printing adventure. And if you’d like to support my upgrades, consider buying your gear through my Amazon affiliate links, which give me a small portion of your purchase without costing you any more.
Update: Part 2, the first round of enhancements, is live.

Pingback: Money Pit: 3D Printing Part 2 – First Round of Enhancements | rsts11 – Robert Novak on system administration
Really interested to see where you take this. I’ve been doing a lot of single board computer projects since the lockdowns began, and I was on the fence about the ebay auction when I saw it; this post pushed me over the edge, and I’ve ordered one of them. Now I just have to figure out how to sneak it into the apartment when the Mrs isn’t looking (“you bought MORE computers?”)
LikeLike
This one is a bit difficult to sneak in. The tray is 42x17x2 inches and comes well packed in a shipping box. 🙂 But I have 4 Jetsons and 8 NUCs mounted in 3D-printed stacks already… will see how they work out and what I end up doing with them.
LikeLike
I’ve got mine now, and yeah, the rack is fairly large. Did you design your own stacking or grab one off the internet? I’ve got all the boards out (and have tested them all), and I’m ready to start assembling, but I can’t find anywhere to get the stacks I found on Thingverse printed for less than the cost of 2 printers 🙂 At this point, the only thing keeping me back from getting a 3d printer is that I simply don’t have the space.
LikeLiked by 1 person
I thought I had linked to the Prusa page for the stack plates. I used two different patterns of course – the two-up NUC from https://www.prusaprinters.org/prints/32486-nuc-cluster-plates/files and the TK1 sandwich board from https://www.thingiverse.com/thing:376124 (top plate is https://www.thingiverse.com/thing:2163999 I believe).
LikeLike
Pingback: Money Pit: A quick sidebar on my 3D printing (mis-)adventure | rsts11 – Robert Novak on system administration
Pingback: Money Pit: 3D Printing Part 3 – OctoPrint and OctoPi | rsts11 – Robert Novak on system administration