On The Road With A Travel Router: The RAVPower FileHub WD009

[A quick note – This router was a current product, and the review was current, as of April 2019. As I add this update in 2024, the router still works as it did before, and it’s sitting in its case on my desk right now. However, obviously, it’s no longer the latest and greatest, Ravpower is no longer on Amazon, and I wouldn’t necessarily recommend it first in 2024 and beyond. I have some other newer routers on the shelf to test and write about, and I hope to have those written before Christmas, but consider this a document that was valid in 2019 and may still have relevance today. If you really want a router of this style and form factor, NewQ has a version here that’s about $85 as of August 2025]

A few weeks ago, the folks at RavPower asked if I’d like to do a livestream review on their Facebook group for the newest version of their FileHub travel router/battery pack/micro-NAS device.

You can find the video of that 25 minute session here on Facebook.  Skip to 4 minutes in, and excuse the terrible laptop audio artifacts.

Promo codes turn up in the RAVPower Official Group on Facebook from time to time, as well as on the Amazon listings themselves. You can purchase through this link and also support rsts11 a little bit. .

I also talked about their newest “PD Pioneer” 20100mAh 45W Power Delivery charging bank on another live stream on May 8th,

See part one: “Introduction and Overview” for an explanation of the concept of a travel router and what you might look for in one. Watch for part three coming soon.

Disclosure: RavPower provided the review unit at no cost to me, and provided me with a commission for any sales through my promo code. They also shared some use cases to focus on, but did not preview or edit the  livestream or this post.

WHAT’S WITH THIS RAVPOWER FILEHUB YOU WERE TALKING ABOUT?

The WD009 FileHub. Credit card sized hotel key card and US quarter for scale.

The WD009 FileHub. Credit card sized hotel key card and US quarter for scale.

So first of all, here it is on Amazon. [no longer available on Amazon, see above for another version] The usual price on Amazon is $59.99, but they often have checkbox discounts of a few bucks, or discount codes on their website and Facebook community.

The FileHub WD009 is (I believe) Ravpower’s third generation travel router. I’ve used the first generation (WD02, no longer available on Amazon) and they have a WD03 “FileHub Plus” model that’s available internationally with 802.11n wireless connectivity.

If you can’t acquire the WD009 (sorry to the Aussies in particular), the WD03 is a good deal at $43. It is single-band like the WD008 “FileHub Nano“, so no option for 5GHz band, and I’d expect it to be a little bit slower (and with no one-touch backup option–we’ll discuss this later). It does have the same 6700mAh battery built in. Continue reading

On The Road With A Travel Router: Introduction and Overview

A few weeks ago, the folks at RavPower asked if I’d like to do a livestream review on their Facebook group for the newest version of their FileHub travel router/battery pack/micro-NAS device. Since I’d used previous versions and had a grasp of the feature set, I agreed to do it, and they sent me a free unit to test and discuss.

You can find the video of that 25 minute session here on Facebook.  Skip to about 4 minutes in if you can.

The promo code originally offered in Spring 2019 has expired, but you can watch their Amazon listings for checkbox discounts on a regular basis. If you want to skip the video, you can purchase through this link.

Some of the advice in this post will apply to other routers, including some I’ve discussed in past blog posts.

The second part of this series covers the RavPower WD009 travel router in detail.

Disclosure: RavPower provided the review unit at no cost to me, and will provide a commission to me for any sales through my promo code. They did also share some use cases to focus on, but did not preview or edit the livestream or this series of posts.

WHY DO I WANT A TRAVEL ROUTER?

With a travel router, you’re able to connect multiple personal devices to a single Internet connection, with some level of security protection. And you can do this for all of your devices (or your family’s devices) without having to pay for extra device connections to your host facility’s service.

Some hotels still limit the number of devices or MAC addresses that can connect on a single account. Others may have mobile-unfriendly splash screens or access methods. And if your hotel’s WiFi uses your highly secure loyalty program password that is a pain to type on a mobile phone and can’t be auto-filled from your password manager, that’s going to be a headache too.

So with a travel router, you can authenticate to this device, and whenever you go somewhere, you connect to its portal and set up the Internet connection once. Everything else just connects in.

Some travel routers have additional features. Most have a battery built in so you don’t have to plug into the wall (and you can even charge your phone from it). Some have options for USB modems for cellular connections. Many offer some sort of media sharing and backup feature. Depending on your needs during travel, one or all of these features may be desirable.

SO WHAT IS A TRAVEL ROUTER? HOW IS IT DIFFERENT FROM A REGULAR ROUTER?

You probably know that a router is a device with at least two network connections that acts as a gateway between those two networks. You have one at home if you have Internet service. It might be built into your cablemodem or DSL modem, or it might be a product that connects to that modem. It may even provide your WiFi access point too. For me, I have a Meraki MX84 for my home network, and my DSL backup uses the provider’s router with integrated wifi.

The problem with these devices for travel use is fourfold:

  1. They’re often expensive. A good home router is probably going to cost around $200, although you can get viable devices for around $100.
  2. They’re often heavy/bulky. My MX84 is a 1U rackmount device that would take up a lot of room in a suitcase. Many consumer devices have unwieldy-for-travel antennas.
  3. They almost always require wall power (although with devices like the Omnicharge battery packs with AC out, you could get around this).
  4. They usually don’t support WiFi-as-WAN, which is what you need to connect them to a WiFi network, whether in a hotel, a business center or conference facility, or even a coffee shop. Some do, but not all.

And since I ruined my intended threefold list, a fifth item is that if you pull your home router out to travel, anyone still at home is out of luck (or you need a second expensive device).

So here comes the travel router to save the day. Let’s run down the fit.

  1. They’re usually inexpensive. Think $75 or less for a full-featured device.
  2. They’re often light and manageable. Most of mine are the size of a box of bandages or a small block of cheese, and one would fit in about half of a Red Bull can. Not sure why you’d have a block of cheese or an empty Red Bull can in your laptop bag, but that’s fine.
  3. They almost always have an integrated battery, which powers the router and wifi functionality as well as offering an external charging source for your phone or the like. The few that don’t will use a MicroUSB connection to power them, so you can plug into a phone charger or your laptop for power.
  4. They almost always support WiFi-as-WAN, letting you log in once to the hotel or conference WiFi and run all of your devices behind it.
  5. Since it’s not your home router, nobody left at home will even know your travel router is gone.

So the take-home summary is that with a sub-$100 travel router, you can share a public and/or paid Internet connection with multiple devices, sharing media and connectivity between your own devices securely, and even back up your mobile devices on the road.

SO WHERE DO WE GO FROM HERE?

This is the first part in a three part series on travel hubs. Check out the second part that goes into deeper detail on the RavPower FileHub WD009 (posted here), and keep an eye out for the third part covering another vendor’s travel hub that provides cellular hotspot and Ethernet bridging.

If you do choose to buy the FileHub WD009, use this link to Amazon (and it sends a couple of bucks my way). It’s $59.99 as I write this, with a $3 coupon on Amazon (and I’ve seen $3-5 coupons before).

Quick Take: Anker PowerLine II USB-C to Lightning charging cable for iPhone and iPad Pro

A week or two ago, I wrote about Apple opening the USB-C-to-Lightning cable market up to third parties after a couple of years of lock-in. Today I’m back with a quick update on one of the two cables I’ve seen, in case you’re looking to rapid-charge an iPhone 8 or later, or an iPad Pro, with Lightning.

Anyway, I got the Anker USB-C to Lightning charging cable in last week. It’s now available on Amazon for $15.99 in white or $17.99 in black, although they are rolling in and out of stock.

First look at the PowerLine II cable

The cable is in Anker’s PowerLine II highly durable cable line, rated for 12,000 bends.

Here you see the Anker cable coiled with the Apple cable, alongside three of the USB-PD chargers I tried it out with. The cable is thicker and looks and feels sturdier than the Apple cable. It comes with a Velcro tie to coil the cable safely, which is a nice touch.

Charging sources tested:

Also fully expected to work (but not tested or pictured):

One upside to the Apple chargers is that you can find Apple stores (and other retailers like Best  Buy and Fry’s who sell Apple products) all over the place. In an emergency, you can pick up a charger without waiting for shipping. I had to do this with an 87W charger to keep my Dell XPS 15 9550 running during a trip to Las Vegas a couple of years ago.

Trying out the cable with iPad Pro 12.9″ (2015)

2019-02-21 13.56.58The testing was pretty simple. This time, I used the new Klein Tools ET920 tester (chosen because it has a captive USB-C cable rather than the dongle-style connection of the Plugable and Satechi testers). The tester does not cross the streams, so to speak, so to test USB-C output you have to use the USB-C input (same goes for USB-A).

I plugged the tester’s USB-C input into each of the chargers shown above, connected the Anker Powerline II cable to the output and to the 12.9″ iPad Pro 12.9″ (2015 model), and watched for the voltage bounce.

As you see in the photos, charging started at about 5V/2A, and about 8 seconds later, the voltage jumped to nearly 15V as expected. This was the same behavior as with the Apple cables.

This is not a surprising review or result; Anker does cables well, and the chip that makes the USB-C to Lightning rapid charging possible is licensed from Apple. However, I’d have been hesitant to recommend it without trying it out myself.

Based on my use of the Anker PowerLine II charging cable, I’m comfortable recommending it, and with a number of Lightning devices in the house, I can always use another charging cable.

The Cascade Cables version discussed in the earlier post is expected in April. While they did not yet respond to my inquiry about testing with 28W rapid-charge devices like the iPhone 8 and later, and iPad Pro models with Lightning, it seems likely that they will work. Watch for an update in two months on that.

Have you upgraded your Lightning charging options from the ones that came in the box? Any thoughts or questions on charging options? Share in the comments, and I’ll answer if I can.


Straying into Ubiquiti territory for a home network experiment, part 1

As many of you know, I run my home, lab, and store networks primarily on Meraki gear. Employee discounts and internal system engineer promos make it a reasonably priced platform for me, but I can understand why non-Cisco employees might not build out a substantial home network on their own dime with Meraki.

Having cut directly over from the Linksys WRT1900AC as a router to a mix of MX security appliances, MS switches, and MR access points, I didn’t really take the time to evaluate other options. However, with many friends getting into Ubiquiti, I figured it was worth trying that platform out, especially when some of the devices went on sale at a local computer store.

In this post I’ll talk about the initial deployment and the gear I’ve purchased. I do have a few items from Ubiquiti that I won’t be using for this environment (like the EdgeRouters and a couple of relatively ancient 24v POE access points).

Spoiler: I’m still a big Meraki fan, and if I were deploying in a business environment where I didn’t want to tweak much or where I wanted enterprise-grade features, I’d still lean toward that platform. However, for a home network, home office, or early stage  startup, the Ubiquiti option is definitely worth a look.

Initial Bill of Materials

ubnt-cloudkey-aa-1.jpg

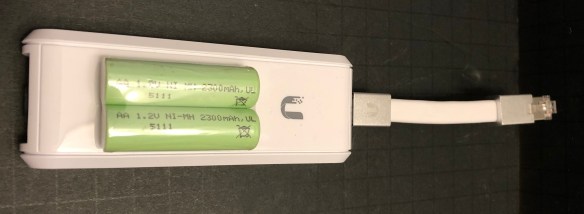
UC-CK Cloud Key, with two AA batteries for scale

Note that Amazon offers some combos with multiple elements, like this $349 combo with Cloud Key, Switch, and Security Gateway. You may be able to get quicker shipping and/or save a buck or two that way, but look around at the combos to see what makes the most sense. If you decide to buy multiples, there may be discounted packs of devices (like this 5-pack of AP-AC-PRO which saves you about $15 per device).

You’ll also find the items on Newegg, including Newegg on eBay, Central Computers (if you’re in the SF Bay Area), and direct from Ubiquiti. If you use the Amazon or eBay links above, we get a few bucks that will go back into gear to review here and on rsts11travel.

Why did I choose this particular gear?

ubnt cloudkey

UniFi Cloud Key

Like Meraki, Ubiquiti uses the concept of a “cloud controller.” Unlike Meraki, you can place the controller on your own private cloud, or purchase a “Cloud Key” to run on your own network for management. There is still a “public” website to view and manage the network, but you can access the local controller via ssh, https, or a mobile app.

Since I don’t currently have a full-time system running that would host the controller, I chose to buy the older Cloud Key. They have newer versions, with more powerful controller hardware, battery  backup, and more features, but since this is meant to be a basic deployment on a budget (and I wanted to pick up the cloud key locally), I went with the first gen device. This device is about the size of four AA  batteries; can be powered by PoE or a USB cable; and of course still requires a LAN connection even if powered by USB.

ubnt accesspoint

UniFi AC Pro

For wireless access, there are over a dozen different AP models, compared and contrasted on the Ubiquiti knowledgebase. The three devices in the “wave 1” family (UniFi AC) include the Lite, the LR (long range), and the Pro. My decision on the Pro was based primarily on “ooh, it’s on sale” but I’m pretty comfortable with the features including extended 5GHz radio rate of 1300 Mbps, and the dual Ethernet ports for redundancy.

ubnt switch

UniFi Switch 8 60W

The switch is meant to let me offload both the AP and the Cloud Key from their current home on my Meraki MS42P switch, so that I can put them behind the security gateway for more thorough testing. The AP uses 9 watts and the Cloud Key uses 5 watts, so the 60 watt PoE switch should be enough for the near term.  There is a 150 watt version (US-8-150W, for about $190) with two additional SFP modules, if you do need more power. And interestingly, the switch is the only piece in the bill of materials that has a metal shell as opposed to plastic.

ubnt security gateway

Unifi Security Gateway 3-port

Finally, with the USG security gateway, I get additional visibility into the Internet connection itself and my use thereof. Without the USG in the data path, I can see per-device information within my network, and status of the APs and switches, but I don’t have the visibility at a network level.

Starting the deployment

I bought the access point first, and went back a day or two later for the cloud key once I decided not to run the controller on my own hardware. So the CK went up first, plugged in via the tiny Ethernet cable to a port on my Meraki PoE switch.

When I logged in, of course, it was behind a few versions on the firmware. I had issues with firmware updates and “adopting” the device into my Ubiquiti cloud portal. The adoption failed claiming the device was unreachable, and the firmware upgrade didn’t seem to start, much less complete.

So I ended up doing some minor workarounds using some steps from a community post here for the firmware update. I wish I could remember the fix for the adoption, although I suspect I’ll figure it out again on a future device and can report back then.

Once the Cloud Key was recognized, updated, and working properly, I adopted the Access Point and updated it. I configured a wireless network and went downstairs from the home office to connect my iPad to the new network and test it out.

Not surprisingly, the network was as fast and efficient as it was through the MR34 at the same distance. I did learn from the Ubiquiti interface that there were at least 50 networks detected by the AP-AC-PRO, which was slightly surprising. Despite that, I’m seeing about 20% utilization on 2.4GHz and 3% utilization on 5GHz and noticeable but not overwhelming “interference” registering primarily on 2.4GHz.

I also realized that the extra MR34 downstairs, connected through an MS220-8P switch that was uplinked through Powerline networking, was definitely throttling my connectivity when I associated with it. Unplugging the AP forced my iPad to connect to the upstairs MR34, and I didn’t have any issues even at the distance. So for now, the Powerline network is driving two tiny Verium miners and my two printers, as well as an Intel NUC in the living room.

What comes next?

After reorganizing a bit of the home office, I’ll be turning up the USG security gateway and the 8-port switch very soon. At that point I’m likely to put all four pieces behind my secondary Internet connection (to enable the home network SLA to be maintained), and run some traffic through it.

I’m also giving serious thought to powering the USG through a PoE splitter like the Wifi Texas one ($18 on Amazon) so that all four devices can be powered from a single wall outlet (for the switch).

Check in soon for the second part of this journey, and feel free to share any suggestions, comments, references, designs, etc in the comments below.


Good news on the USB-C to Lightning front… maybe…

There are a few power units I’ve been using, testing, and documenting over the last many months. It’s easy to get 5V 2.4A charging, and Qualcomm Quick Charge standards (or Anker’s analogue to them) are pretty easy too. But there’s a somewhat new charging consideration that’s lighting up even more this year, with a possible catch.

When Apple released the iPad Pro (12.9″ 1st generation) in 2015, it was an amazing media consumption and even creation device. Support for the new Apple Pencil for creative types, a huge beautiful screen, and a huge 10Ah 38Whr battery… what’s not to like?

How about charging that huge battery?

Aye, there’s the rub. The iPad Pro came with a 12 watt USB-A charger like iPhones did, and a USB-A to Lightning cable like iPhones did. It’s what Apple had available, and it would probably recharge your iPad Pro in 4-6 hours. (As you can see on the right, mine hasn’t left the box in about 3 years.)

Soon, though, Apple released a USB-C to Lightning cable, which would allow you to charge at about 28 watts (that’s 2.3x as fast on a good day). This cable also opened the door to directly connecting to the new USB-C Macbooks, and with the 30W or better Apple chargers, you could get that 28 watt charge going. Most USB Power Delivery chargers and battery packs at 29 watts or higher can also rapid charge your iPad Pro.

When the iPhone 8 generation came out, Apple started supporting a rapid charge at 18 watts for those devices, and newer iPad non-Pro models (in the last year) have also taken on the faster charge rates.

The catch was, Apple did not sell or license their USB-C rapid charge chips for third party manufacturers. So while some overseas companies made USB-C to Lightning cables, they couldn’t charge faster than the standard USB-A cable, and wouldn’t be MFI-certified. So $19-35 went to Apple for each of those cables, and you got your rapid charging.

You also got typical Apple cable sturdiness (such as it is), which left many people replacing cables and grumbling.

But then, it all changed

Anker USB-C to Lightning Cable

Now that Apple is moving to USB-C for charging their devices, they’re also allowing third party USB-C to Lightning cables by licensing the C89 and similar connectors/chips.

Anker announced one last month at CES, pre-orderable now on their website and shipping later this month, and a crowdfunding project from a company called Cascade Cables is also promising such a cable coming in April.

These new cables are sturdier, potentially more aesthetically pleasing, and the Anker cable is priced lower than the Apple version by a couple of bucks. Now the question is whether these cables will support the full range of charging rates that those of us with larger devices will need.

Cascade USB-C to Lightning Cable

Anker responded to an inquiry on Facebook about the iPad Pro charge rate by telling me that my iPad had USB-C and I could use USB-C to USB-C cabling. Alas, the 2015 iPad Pro doesn’t have USB-C, and they didn’t follow up on the question. However, their pre-order page says it uses USB Power Delivery, which has me feeling optimistic.

I’ve inquired with Cascade Cables as to whether they’ve tested with 28W devices. I’ll update this post if I hear back from them.

It takes more than a cable

With the higher power cabling, whether from Apple or a third party, you’ll need a USB-C Power Delivery charger to negotiate the higher power level.

The easy option is to pick up an Apple USB-C Macbook charger.

If you already have one for your Macbook, you can use it to rapid-charge your iOS devices as well. And note that if you have another USB-C charged laptop (like a Dell XPS 13 or XPS 15, a newer Lenovo, and so forth), you can use the Apple chargers as long as they feed enough wattage to charge your device.

For the third party side, I’ve had very good experiences with Anker, so it’s worth considering a charger from them that provides at least 29 watts on USB-C, like the Powerport II ($30) or Powerport Speed+ Duo ($26). The Powerport II offers up to 19.5 watts on USB-A, which is good for quick-charge devices or iPhone 8 or later; the Speed+ Duo is limited to 12 watts on USB-A.

If you’re patient, Anker has also announced their entry into the GaN (gallium nitride) charging field, the Powerport Atom PD1 charger which gives 30 watts of juice in a tiny form factor. It’s listed on their website for pre-order on Amazon, but Amazon is currently offering email alerts for when it’s available to order. I’ll update when that comes out of unobtanium as well. I have the RavPower 45W GaN charger in house, and will be writing that up soon too.

And if you want to see what power profile your charger is negotiating, regardless of which charger or cable you use, I’ve used the Plugable ($20) and Satechi ($30, right) USB-C power meters with good results. You don’t need a power meter to just charge your devices, but it can be useful to troubleshoot slow charging, flaky cables, or power profile mismatches (like the ones we’ve experienced with the Dell XPS 13 9370).

Where do we go from here?

As the newer cables come out, I’ll be acquiring and testing them. Same goes for the new PD1 charger from Anker. With an iPhone 8 Plus, a 2017 iPad Pro 10.5, and a 2015 iPad Pro 12.9 in the house, rapid charging is an important topic.

I’ll also have some updated coverage on battery packs to rapid charge your iOS devices, and even charge your USB-C Power Delivery laptops. The new HyperJuice “World’s Most Powerful USB-C Battery Pack” and Omni Ultimate battery packs are in house and ready to test, when work lets up a bit.

What are your charging concerns, and what interesting solutions have you found to keep your devices up and running? Share in the comments, or ask any questions you may have.

As always, if you buy through our links above, we get a small commission, which then goes back into buying more stuff to review here and on rsts11travel. We appreciate your support.