One easy step to save two weeks of waiting for Chia Network farming, and a quick node build for under $500

I’ve started work on a walkthrough of Chia farming from download to payout. It’s turned out to be a bit more challenging than I thought, but I’m still plowing through. 

This video (below) is NOT the walkthrough. It is a quick overview, with an hour of sped-up node syncing. Three hours to get the last four weeks synced… not very fun but it makes a point, and gets some content up on the Andromedary Instinct YouTube channel. 


Looking at the snapshot sync process

In March/April 2023, Chia Network posted a snapshot of the blockchain database as of March 31, 2023. They updated it in July to the June 30 snapshot. 

Why does this matter? Well, syncing the blockchain to your node is necessary to plot and do transactions (there may be workarounds for both, but the usual path is to sync a full node and then start farming). That’s a pretty slow process.

On a very well-tuned farmer with great network and I/O, I suspect you can get a node synced in a day or so. Last time I synced from scratch on a Raspberry Pi, I believe it was 11 days, and would be longer today. The machine in this video took three hours to sync 4 weeks of activity, and that skips over the dust storm phase of the blockchain (which effectively knocked a lot of slower nodes offline until Chia Network did some software enhancements to better deal with dust storms). 

By using BitTorrent to grab a snapshot (about 65GB compressed, 125GB uncompressed) in a few hours, you skip closer to the front of the line in syncing status. You can then “resume” syncing from the start of July and even on a suboptimal machine like my test machine, you’ll be done in under a day. 

This video also shares one of the better guides to moving your database directory. In my case, the boot drive it was originally syncing to is a 256GB drive, and it would eventually fill up the drive. I moved it off to a second SSD so that the boot drive won’t degrade. 

Building that system, and what I’d do differently

I realized as I started plotting (heh) the video flow that it would be easier to start with a fresh computer. I had another use for an Alder Lake-based machine coming up, and I managed to get a complete system new in open box for $250 locally, so I went for it. As configured, it cost me less than $500, but if I were building it for long term Chia use without “free” review stock from Amazon Vine, I’d make a few other changes. 

Bill of Materials, as built ($537 with caveats)

If I were building it today without existing parts stock ($474):

This HP desktop system maxes at 32GB RAM, so plotting may be limited even with a GPU. However, for storage it’s pretty good, with two 5GBit USB-A ports, two 10GBit USB-A ports, and one 10GBit USB-C port on the front (in addition to two USB 2.0 ports on the back). The board supports two SATA drives with power connectors plus the NVMe. And it’s not a bad CPU – 6 P-Cores with hyperthreading. 

Once I finish the video, I’ll be swapping out the boot drive for a better one to install Ubuntu and Arweave on. I still prefer running my node databases on moderate to good performance NVMe over an economy SATA drive whenever possible. 

Some other options for plotting and farming systems

This HP desktop build met my primary criterion – ability to get a system cheap and quick and local to set up Chia from the ground up. But as noted above, it’s not perfect, and has definite limits (like one x1 and one x16 PCIe slot, only two SATA drives, 32GB max RAM). 

Some other options that I can recommend would be:

I have two T7910s, and even though they’re several years old, they have a lot of expandability and performance while being fairly manageable in size, shape, noise level, and power draw. 

This one has two E5-2695v4 processors and 512GB RAM included. You can branch out into compressed plots and/or RAM-based plotting, both of which will accelerate your plotting. With several x16 PCIe slots and either 4 3.5″ or 8 2.5″ drives (not sure which is the case on this system), you can expand with GPUs, storage adapters, internal SAS/SATA drives, or even faster networking. 

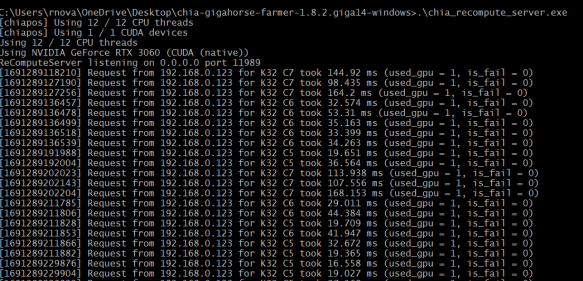
My primary plotter is still a T7910 with two E5-2650Lv4 (14c28t) processors and 128GB RAM, plus a RTX3060 GPU 

If you’re looking for a slightly different config, there are a number of options with different mix of CPU, RAM, and storage at the Amazon Renewed store.

Another alternative is to go a bit more modern with a T7920, which uses first gen Xeon Scalable processor instead of the Xeon E5 v4 line. There are a fair number of first gen Xeon Scalable gold processors for double digit prices on eBay in case you start with a silver or bronze level processor.

  • Mini PCs, primarily for farming or uncompressed plotting

There are a lot of NUCs and NUC-Class systems out there. I’ve got systems from ACEMAGICIAN, GEEKOM, and Beelink in the home lab/studio, as well as my classic Chia NUC plotter, the NUC10i7FNH from a couple of years ago. 

These are not very expandable in terms of interfaces or GPUs, but with Thunderbolt you could use a Thunderbolt Hub to attach additional USB hubs and drives, or a Thunderbolt PCIe enclosure to attach a SAS card or GPU.

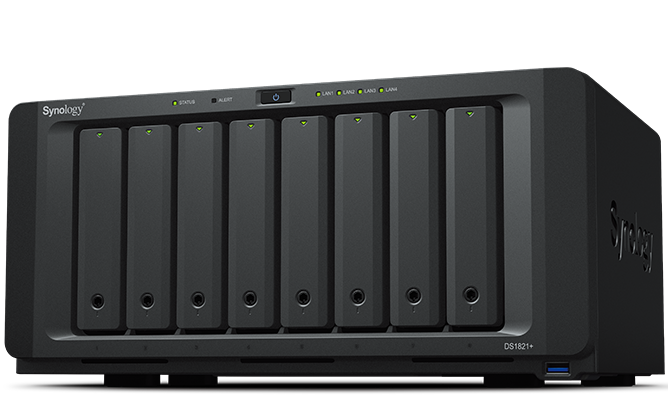
At some point, however, if you’re looking at expanding your NUC or mini-PC that much, though, you may want to consider either a NAS or a desktop/workstation/server with SAS enclosures to handle the drives. 

Little-known ways to work with GPUs for Chia farming with Gigahorse (#4 will surprise you)

A lot of people hate reading documentation, so I’m writing meta-documentation based on the documentation to help you get things going with FlexFarmer and Gigahorse compressed plots.

The authoritative site for Gigahorse details is madMAx43v34’s github, which is where you can find all of his software. And any references in this post will be to Gigahorse software, not Bladebit.

And as always, anything I post even vaguely related to Flexpool here on rsts11.com is not official or endorsed by Flexpool, even though I have been on their support team for over two years now.

In this post:

  1. Farming Gigahorse compressed plots on Windows
  2. Using a remote GPU for farming from Windows or Linux
  3. Selecting which GPUs to use for farming
  4. There is no spoon
  5. A shortcut to farming compressed plots (albeit Bladebit compressed), at a premium

Farming Gigahorse compressed plots on Windows (kinda)

You need a Linux system to farm compressed plots at this point. Luckily if you have Windows 10 or later with current patches, you have a Linux system ready to install.

I’ve co-written a guide to FlexFarmer + Gigahorse compressed plots + Windows + WSL over on Reddit. It’s not an official supported deployment for Flexpool (i.e. the pool doesn’t provide official support for it) but it does work. I’ve used it myself on a small farm to verify the guide, and many others do the same with as much as a petabyte or more.

Using a remote GPU for farming from Windows or Linux

But maybe your Windows machine doesn’t have a suitable GPU, or you want to farm using an AMD GPU when the Gigahorse module in FlexFarmer only recognizes NVIDIA.

That’s easier to document, and in fact it works with Linux farmers too (I set up remote compute from my Linux plotter to my Windows 10 desktop so I could dedicate the GPU to plotting for a while).

The right thing to do of course would be to go to the Remote Compute section of madMAx43v34’s github and read up on the feature there. But to simplify it, here are the steps.

On the machine with the GPU you want to share (the “recompute server”), either get the Gigahorse bundle for the relevant OS, or download the chia_recompute_server program from the appropriate directory.

On the recompute server, make the downloaded binary executable (on Linux), and then run it.

That’s it.

Now on your farmer, you need to set the environment variable CHIAPOS_RECOMPUTE_HOST to your recompute server’s name or IP address.

Note that this name does NOT mean you need to be running chiapos plotter or the Chia or Gigahorse full node. If you are running Gigahorse farmer, you have to restart the Gigahorse farmer after setting the variable, but for FlexFarmer you do not. 

For example, if your recompute server is 192.168.0.2, you enter:

export CHIAPOS_RECOMPUTE_HOST=192.168.0.2

before running FlexFarmer on your Linux farmer.

If you’re running Windows WITHOUT WSL, Max provides this link on to set environment variables in Windows: https://phoenixnap.com/kb/windows-set-environment-variable#ftoc-heading-4

Selecting GPUs to farm with

If you have multiple GPUs but you want to only use selected GPUs with FlexFarmer, Max’s documentation explains how to do this. It’s worth noting that this generally applies to any CUDA software.

Use the “nvidia-smi” command inside of WSL, or under Linux natively, to list your GPUs and determine which device numbers apply.

You use the CUDA_VISIBLE_DEVICES environment variable to choose the devices you want the farmer to use. In the example above, I only have one GPU so it’s device 0, but if you have multiples, they will be listed and you can choose the ones you want.

From Max’s documentation:


Once again, the note above about full notes applies. If you’re using a configured FlexFarmer instance, just set this environment variable and the CUDA libraries used in the Gigahorse module will pick it up.

CDN media

If you want to disable GPU usage in FlexFarmer, there’s a two line configuration option to disable hardware (GPU) acceleration.


Using Evergreen Miner as a shortcut to compressed farming

This is a somewhat controversial option, and if you already have the hardware to plot and farm and can manage your software on your own, you don’t need Evergreen.

Based on developments between August 2024 and February 2025, I can no longer recommend this option, but I am leaving the content here (and removing my affiliate link).

However, if you want a power optimized option where you don’t have to have a plotter at all, and just buy drives in enclosures with plots already made for you, Evergreen Miner is a viable option.

In short, you buy an “Evergreen Hub” which is a single-board computer with a customized Linux install that provides all the software for farming, interacting with the mobile app, and managing storage attached to it. Then you buy (or provide and plot your own) hard drives that connect to the Hub over USB.

Generally you’d buy a starter kit that includes 1 or more hard drives pre-loaded with plotted drives. You can then add more drives, up to 25 per hub, either through their pre-plotted offer or sourced and plotted by you (if you choose to expand on your own).

With the kits and drives from Evergreen, you get the needed cabling, including a single PSU (12V 10A) and splitter cables, as well as everything to connect the hub to the drives and to your network.

Even though I’ve been plotting since mainnet launch in 2021, and have plenty of gear and ~160TB plotted and farming, I bought a 12TB starter kit and it’s been chugging along.

I believe the beta compressed-plot farmer for Evergreen is going into general release in the next week or two (i.e. mid August 2023), and the Chia Blockchain software release that includes Bladebit compressed plot generation is coming soon after (it’s in release candidate 3 as I write this). When those both happen, I’ll be giving a try to the Bladebit compression, and may get a chance to update this post with the details.

Where do we go from here?

I’m working on some video demos of the Chia process, from initial downloads to first payout. I hope those will go live later this month.

I also have some mini-PC reviews in the buffer. Stay tuned. It’s not all crypto out there after all.

Have you been working with compressed plots or Evergreen Miner or both? Any observations, discoveries, or questions? Join us in the comments below.

A single-board Chia plotter, a DOA RMA, and an adventure in external boot installers with the Orange Pi 5B

This isn’t entirely a Chia post, although it was inspired as such. You may have seen a teaser post on r/Chia, but if you didn’t, you’ll be okay.

In my time in the Evergreen Miner community, and elsewhere, I’ve had people ask if you can plot Chia on a Raspberry Pi.

I’m pleased to report that it can be done on a 4GB Raspberry Pi 4B, and you can create a Gigahorse compressed C5 plot in about 22.1 hours. For this test I used the 4GB board, booted from a MicroSD card, with an external USB 3.0 to SATA enclosure and a 1.92TB Dell Enterprise SATA SSD.

I wanted to try on my remaining 8GB board, but it is having issues with USB storage, so after a couple of hours of testing, I set it aside and thought about other low cost, low power options.

I tried my Zimaboard 216 single-board x86_64 server, featuring a 2 core Celeron processor, 2GB RAM, 16GB eMMC storage, a PCIe 2.0 x4 slot, two SATA ports with power (for SSDs), two ports USB 3.0, dual Gigabit Ethernet, and a completely silent (fanless) design. Alas, while the plotter “worked” on this system, 2GB was not enough, and the OOM killer process took down the plotter. I have a Zimaboard 832 (the 2021 green edition, good for Chia) but ran out of weekend so I just went with plan C.

Enter the Orange Pi

I’d heard good things from the Evergreen co-founder about the Rockchip 3588, and ordered an Orange Pi 5B with 16GB RAM and 256GB eMMC. I got it over the weekend, hooked it up, discovered that you have to use rkdevtools to install it, but still could not get video or network connectivity with it. It got power, and drove the fan, but no status LEDs, no network LEDs, and no rkdevtools access.

After checking with a friend, I learned that it should not have come loose in a cardboard box.

My first Orange Pi arrived exactly like this product page photo, but with the wifi antennas connected. No anti-static bag, no packaging protection, and no functionality.

I put in for an exchange, dropped off the board at my local Whole Foods for return, and got the replacement board Tuesday morning. This time, it was in a sealed anti-static foil bag in a plastic protective case. Much better.

The second Orange Pi arrived like this, and seems to have worked.

I set about doing the board bring-up. It’s more complicated than a Raspberry Pi, requiring the Rockchip dev tools package, a boot loader, and a specific Orange Pi build of Ubuntu. The well-formatted instructions for Klipper on the 5B from 3DP and Me were very useful for getting things going. You can also get the apparently-official 357 page users guide from Orange Pi’s Google Drive that has the instructions and more. I don’t recommend it if you can avoid it, though (ps: you probably can’t completely avoid it, but maybe don’t start with it).

The software downloads were a bit confusing for me… you have to get an Android image download (even if you’re not installing Android) from another Google Drive, which includes the RKDevTool program for Windows, the “DriverAssitant” bundle including the USB driver for board bringup, and the Miniloader folder with boot loader and configuration. It’s a long way from Raspberry Pi Imager or Rufus. And random Google Drive download sources are sketchy.

Anyway, after waiting two hours for the “download complete” message in RKDevTool that never came, I tried logging in via ssh with root / orangepi and got in. (Page 87 on the manual above, so maybe don’t completely avoid it).

From there I made a few more adjustments:

  1. Installed Zerotier VPN and joined it to my network.
  2. Executed ‘apt update’ followed by ‘apt upgrade’
  3. Set my time zone away from Asia/Shanghai with ‘dpkg-reconfigure tzdata’
  4. Verified that I could log in with orangepi, and left the root shell
  5. Changed root and orangepi passwords
  6. Rebooted to make the updates take effect (and to install my external USB SSD)

There are a lot of Orange Pi 5 series models

Another odd sequence of discoveries is that there are three primary models of the Orange Pi 5, each of which may come with different RAM and eMMC storage. I learned some of the distinctions after digging for my one NVMe drive that was smaller than 2280, and then finding there was no NVMe slot.

Here are the three models, with pricing for the smallest configuration I could find on Amazon. I would really recommend the 16GB models, and max out the storage if you go 5B. But it depends on your use case of course.

ModelOrange Pi 5Orange Pi 5BOrange Pi 5 Plus
CPURK3588SRK3588SRK3588S
RAM options4/8/16/324/8/16/324/8/16
Video options1x HDMI 2.1 out1x HDMI 2.1 out2x HDMI out, 1x HDMI in
Network options1x Gigabit Ethernet1x Gigabit Ethernet2x 2.5 Gigabit
Onboard storageNone32/64/128/256None
Optional storageMicroSDMicroSDMicroSD
2230/2242 NVMe2280 NVMe
eMMC
USB2x 2.0, 1x 3.0, 1x 3.1C2x 2.0, 1x 3.0, 1x 3.1C2x 2.0, 2x 3.0, 1x 3.0C
OtherWiFi 6 w/2 antennasm.2 E-Key
Bluetooth 5.0 w/BLE
Amazon PriceFrom $90 (4GB)From $100 (4GB/32GB)From $107 (4GB)
Orange Pi 5 models, with prices as of 7/25/2023 (affiliate links for Amazon, direct links for OrangePi.org).

Be aware that on the 5 and 5B, the USB 3.0 port shares a dual blue port assembly with a 2.0 port–the 3.0 port is on the top, and the bottom port, despite being blue, is USB 2.0. The 5 Plus has a pair of USB 2.0 (black) ports, and a pair of USB 3.0 (blue) ports.

On the Orange Pi 5 and 5B, the only USB 3.0 Type A port is the top port.

You can use a 5V/~4A USB-C power supply and cable, your own HDMI cable, and run without a case (these are slightly larger than a Raspberry Pi so you can’t reuse those cases), but I decided to drop almost $30 on an add-on starter kit. This kit from GeeekPi includes a clear case with tinted top and bottom, rubber feet for said case, USB-C power supply with inline switch, a fan, heatsinks for the DRAM and CPU, a 64GB MicroSDXC card and USB-A card reader, and a HDMI cable. (The description currently says Micro HDMI cable, but the board has native full size HDMI unlike the Pi4b).

Some machines to compare with the Orange Pi 5 family

After posting my plotting tests on Reddit r/chia, someone asked and clarified a question about the Radxa Rock and ODROID machines. I did some quick research and found some viable alternatives. If you have local supply chain or Amazon Prime limitations, these may get you going faster.

Radxa’s Rock 5 Model A and ODROID M1 are comparable to the Orange Pi 5B I tested.

For an upgrade to the Orange Pi 5B Plus style, Rock PI Model B also gives you NVMe onboard and a single 2.5 Gigabit Ethernet port (vs Orange’s dual ports) and support for a Power over Ethernet hat.

If you really want to go overboard, ODROID’s H3 supports NVMe, two DDR4 SODIMMs up to 64GB, dual 2.5 Gigabit Ethernet, two onboard SATA ports, and eMMC support..

I’ve set up an Amazon wishlist to show the systems I’m looking at. If you feel generous and want to send me something from the list, I’ll be happy to give you credit when I post the testing results. If not, it’s a checklist for me to work through.

Where do we go from here?

I tried to keep this post as chia-free as possible, as it’s relevant to a lot of other use cases. I may not have completely succeeded at that. In any event, I will have a Chia plotting post around single board and small board computers in August, and a few other things in mind.

Have I missed your favorite single board computer? Share it in the comments and I’ll add it to my list.

Problems expanding a Synology SHR volume on DS1821+ with a faulty SSD cache attached

I got a Synology DS1821+ array about two years ago, planning to finally cascade my other Synology units and let one or two go. So far, that has not happened, but I’m getting closer. 

DS1821plus Network Attached Storage array from Synology

Synology DS1821+, photo courtesy of Synology. Mine looks like this but with a bit more dust.

The back story of my DS1821+

This is the 8-bay model with a Ryzen V1500B 4-core 2.2GHz processor, support for virtual machines and containers, and a PCIe slot which I filled with a dual port Mellanox ConnectX-3 (CX312A) 10 Gigabit SFP+ card which came in under $100 on eBay. The expansion options include two eSATA ports (usually used for the overly expensive DX expansion units) and four USB 3 ports (one of which now has a 5-bay Terramaster JBOD attached). 

Today I could get a 40 Gigabit card for that price. In fact, I did for another project, for about $90+tax with two Mellanox cables, just last month, but I’m not sure it would work on. It’s not too hard to find one of these 10 Gigabit cards for under $50 shipped in the US. Be sure to get the dual plate or low profile version for this Synology array.

I ran it for a while with 64GB RAM (not “supported” but it works), and then swapped that out to upgrade my XPS 15 9570 laptop, putting that machine’s 32GB back into the Synology. I had a couple of 16TB MDD white label hard drives and a 256GB LiteON SSD as a cache. I know, I know, there’s NVME cache in the bottom and you can even use it as a filesystem volume now.

Here’s where something went wrong

Sometime in the past couple of updates, the SSD cache started warning that it was missing but still accessible. I ignored it, since this system doesn’t see a lot of use and I don’t really care about the cache.

Volume expansion attempt, which failed. SSD cache warning showing here as well.

Earlier this month, I got a couple more of the MDD white label drives (actually ST16000NM001G-2KK103 according to Synology Storage Manager), I was able to expand the storage pool but not the volume.

Successful storage pool expansion
The volume expansion error. No filesystem errors were discovered.

“The system could not expand Volume 1. This may be caused by file system errors. To rescue your data, please sign in to your Synology Account to submit a technical support ticket.”

Well, as I went to the Synology website to enter a ticket, I remembered the SSD issue and wondered if that caused the problem with growing the volume. 

Easier to fix than I had feared

Sure enough, removing the cache made the volume expand normally, bringing me from 93% used to 45% used. Not too bad. 


Where do we go from here?

At some point in the next month or two, I plan to get three more of these 16TB drives, pull the unused 8TB and unused 256GB SSD, and get the system maxed out. 

I’m a bit torn between using this array to replace my Chia farms, at least for a while, or merge my other two substantial Synology arrays onto it and then use one of them (maybe the DS1515+) as the Chia farm with the DX513 and an assortment of external USB drives. Flexfarmer on Docker makes it pretty easy to run Chia farming on a Synology with minimal maintenance. 

Replacing Meraki with TP-Link Omada for the new year

[This post was originally teased on Medium – check it out and follow me there too.]

[Update: As of April 2023 I’m an employee of Cisco again, with access to the employee discounts, and I’ve started rolling back to a Meraki plant. I’ll write a post by the end of the year detailing the reasons and choices, once I’m done.]

I’m a big fan of Meraki, but now that I haven’t been an employee of Cisco for over two years*, I no longer have the free license renewals or the employee purchase discounts on new products and licenses. So October 28, 2022, was the end of my Meraki era. (Technically a month later, but I needed a plan by October 28 just in case.)

The home network, mostly decabled, that got me through the last 4-5 years.

I needed a replacement solution that wouldn’t set me back over a thousand dollars a year, and my original plan was to use a Sophos SG310 either with the Sophos home firewall version or PFsense or the like. I even got the dual 10gig module for it, so that I could support larger internal networks and work with higher speed connectivity when the WAN links go above 1Gbps. I racked it up with a gigabit PoE switch with 10gig links, and now a patch panel and power switching module.

The not-really-interim network plan. The Pyle power strip and iwillink keystone patch panel stayed in the “final” network rack.

But I didn’t make the time to figure it out and build an equivalent solution in time.

How do you solve a problem like Omada?

Sometime in early to mid 2022 I discovered that TP-Link had a cloud-manageable solution called Omada.

It’s similar in nature to Meraki’s cloud management, but far less polished. But on the flip side, licensing 12 Omada devices would cost less than $120/year, vs about $1500/year (or $3k for 3 years) with Meraki. So I figured I’d give it a try.

The core element of the Omada ecosystem is the router. Currently they have two models, the ER605 at about $60-70, and the ER7206 at about $150. I went with the ER605, one version 1 without USB failover (for home, where I have two wireline ISPs), and one version 2 model with USB failover (for my shop where I have one wireline ISP and plan to set up cellular failover).

You’ll note I said cloud-manageable above. That’s a distinction for Omada compared to Meraki, in that you can manage the Omada devices individually per unit (router, switch, access point), or through a controller model.

The controller has three deployment models:

  • On-site hardware (OC200 at $100, for up to 100 devices, or OC300 at $160, for up to 500 devices)
  • On-site or virtualized software controller, free, self-managed
  • Cloud-based controller, $9.95 per device per year (30 day free trial for up to 10 devices I believe)

I installed the software controller on a VM on my Synology array, but decided to go web-based so I could manage it from anywhere without managing access into my home network.

Working out the VPN kinks

The complication to my network is that I have VPN connectivity between home and the shop across town. I also had a VPN into a lab network in the garage. Meraki did this seamlessly with what you could call a cloud witness or gateway – didn’t have to open any holes or even put my CPE into bridge mode. With Omada, I did have to tweak things, and it didn’t go well at first.

I was in bridge mode on Comcast CPE on both ends of the VPN, and did the “manual” setup of the VPN, but never established a connection. I tried a lot of things myself, even asked on the Omada subreddit (to no direct avail).

I came up with Plan B including the purchase of a Meraki MX65. I was ready drop $300-500 to license the MX65 at home, MX64 at the shop, and the MR56 access point at home to keep things going, with other brands of switches to replace the 4-5 Meraki switches I had in use.

As a hail-mary effort, I posted on one of the Omada subreddits. The indirect help I got from Reddit had me re-read other documentation on TP-Link’s site, wherein I found the trick to the VPN connectivity – IKEv1, not v2. Once I made that change, the link came up, and the “VPN Status” in Insights gave me the connectivity.

The trick to the manual VPN connectivity was IKEv1, not v2

The last trick, which Meraki handled transparently when you specified exported subnets, was routing between the two. I had to go to Settings -> Transmission -> Routing and add a static route with next hop to the other side of the tunnel. Suddenly it worked, and I was able to connect back and forth.

Looking at the old infrastructure

My old Meraki network had 12 devices, including three security appliances, four switches, a cellular gateway, and four access points. The home network used the MX84 as the core, with a MS42p as core switch, a MS220-24 as the “workbench” switch on the other side of the room, and a MS220-8P downstairs feeding the television, TiVo, printers, MR42 access point, and my honey’s workstation, connected via wireless link with a DLink media access point in client mode. I also had a MS510TXPP from Netgear, primarily to provide 2.5GbE PoE for the Meraki MR56 access point.

There was a SG550XG-8F8T in my core “rack” (a 4U wall-mountable rack sitting on top of the MS42p switch) but it was not in use at the time – I didn’t have any 10GBase-T gear, and the MS42p had four 10GbE SFP+ slots for my needs.

The garage lab had a SG500XG-8F8T behind the Z1 teleworker appliance. TP-Link powerline feeds that network from the home office.

The remote shop had a MX64, MS220-8P, and MR18, as well as the MG21E with a Google Fi sim card.

So there was a lot to replace, and complicate in the process.

Looking at the new infrastructure

The new core router is the TP-Link ER605, feeding the MS510TXPP switch for mgig and 10gig distribution (including WiFi), with another downlink to a TL-SG2008P switch ($90 at time of purchase) which offers 4 PoE+ ports and integrated monitoring with Omada.

The ER605 has front-facing ports, so I have those cables going into the patch panel to connect Internet uplinks and the PoE switch. On the SG2008P, ports are on the back and LEDs are on the front, so I have all 8 ports going to the patch panel and they feed things from there.

The MS510TXPP has downlinks to the powerline network, a SG500-48X switch across the room connected by 10 Gigabit DAC, and a few other things in the office.

I have the wireless needs fulfilled by a Netgear Nighthawk router in AP mode, and a TP-Link Omada EAP650 access point that needs some tuning. I expect to replace the Nighthawk with the EAP650 at some point, and I have a Motorola Q11 mesh network kit coming soon which could replace much of the wifi in the house.

The downstairs network is still fed by the DLink wireless bridge (as a client of the Nighthawk), but now it has a random Linksys 8 port switch serving the first floor needs.

The garage lab still has the SG500XG, bridged via powerline, and very limited hardware running due to California electric prices.

In the shop, I have the ER605v2, feeding a random 8-port TP-Link unmanaged switch for now. I’m thinking about getting an Omada switch there, and I recently installed a UeeVii WiFi6 access point (acquired through Amazon Vine, review and photos here) which is more than enough to cover the 500 square feet I need there.

Why’d it take so long to post?

I had found an Etsy seller who made 3d printed rackmount accessories, and I ordered a cablemodem mount, router mount, and a 5-port keystone patch panel. I ordered December 15, shipping label was issued December 21, and I expected it right after Christmas. Alas, after a month and two shipping labels being generated, I had no gear and no useful response from the seller, so I got a refund and went with rack plan B.

I took a 14″ 1U rack shelf like this one (but fewer slots and about half the price) and used zip ties to attach the router and 8-port switch to it. Not a great fit, but inside the CRS08 carpeted rack it’s not so visible.

Where do we go from here?

Right now the networks are stable, except for no wifi in the garage and occasional wifi flakiness in the house. So my next steps will be fixing the home wifi, and probably moving another AP to the garage (possibly even setting up a wireless bridge to replace the powerline connection).

I am looking at some more switching, possibly upgrading the Omada switch to replace the Netgear at home, and then take the existing 8 port Omada to the shop to provide more manageability (and PoE+) over there.

The front runners for the new switch right now are the SX3008F (8 port SFP+ at $230; 16 port SX3016F is $500), SG3428X (24 port gigabit, 4 port SFP+), and the SG3210XHP-M2 (8 port 2.5GbE copper PoE + 2 SFP+ slots at $400, pretty much the same as the Netgear except with no 5GbE ports).

There are a couple of other options, like the $500 SSG3452X which is equivalent to the MS42p, but I’ll have to consider power budget and hardware budget, and what I can get sold from the retired stash this month to further fund the expansion.

I also need to work out client VPN to connect in to both sites. I had client VPN on my travel laptop to the shop for a couple of years, but haven’t tried it with the new platform yet.

TP-LInk supposedly has a combination router/controller/limited switch coming out this year, the ER7212 which also offers 110W PoE across eight gigabit ports. It’s apparently available in Europe for 279 Euros. Hopefully it (and other new products) will be released in the US at CES Las Vegas this week.

I was going to bemoan the lack of 10G ports, but then I saw the ER8411 VPN router with two SFP+ ports (one WAN, one WAN/LAN). Still doesn’t seem to support my 2.5Gbit cable WAN, but it’s at least listed on Amazon albeit out of stock as of this writing.